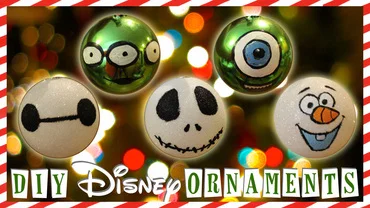
DIY Disney Ornaments
Here are 5 Ideas for some easy DIY Disney Ornaments!
All you need to make these is ornaments (Green and White) and Acrylic Paint!
The first ornament we are going to be making is disney’s newest loveable character, baymax!
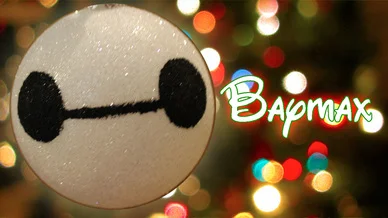
This one is super easy. using a white ornaments All we’re going to do is draw to black dots for eyes and then a line connecting them. And there’s baymax.
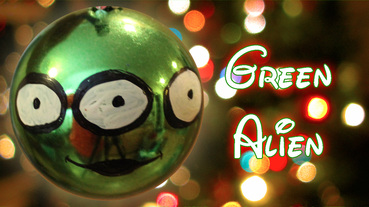
For our second ornament we are going to be making the green aliens from the toy story movies. To start off we are going to take a green ornament and draw three ovals in white for eyes. We’re then going to let that dry for a bit and move on to the mouth. To begin we are going to draw a black line that curves a bit. Then we are going to make an oval shape in the middle of the line, followed by two dimples on the sides. Going back to our eyes we are going to add a black dot in the center of each eye, and then trace the entire eye with black as well.
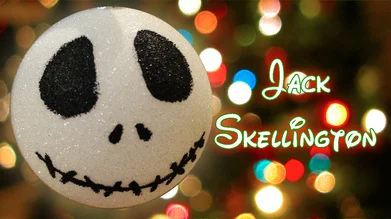
The next ornament we are creating is Jack Skellington from the Nightmare before Christmas. On a white ornament we are going to draw two black egg shapes for the eyes. Then we are going to draw two tiny lines for the nose. After that we are going to draw a line that curves from one side of the face to the other. The final step is to add the stitches to Jacks mouth.
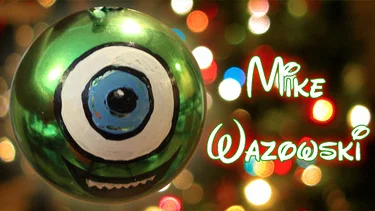
The fourth ornament is none other than Mike Wazowski from Monsters Inc. To start off we are going to take a green ornament and draw a medium sized circle in the middle with light blue paint. From here we are going to draw an outline of a larger circle in white and fill it in. Next we are going to use the white to draw 5 teeth. After we’ve let that dry for a bit we are going to outline the blue circle we some black paint. We are then going to draw a black circle inside the blue circle. Then outline the white circle. Moving back to the teeth we are going to draw a outline of a half circle in black and then fill it in. To finish this ornament off we are going to add a small white circle on top of the black circle to complete the eye.
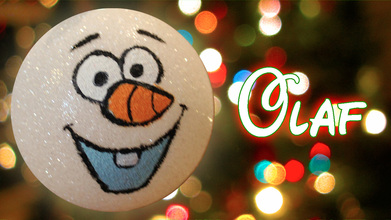
Our final ornament is Olaf the snowman from Frozen. This ornament was definitely a favorite amongst my friends and while it was probably the most difficult to make of these ornaments its still super easy to do! And trust me, everyone is going to love it. The first step is to take a white ornament and using white paint we are going to draw two circles, slightly overlapping each other. Then using orange paint we are going to draw the carrot nose. For the mouth we are going to use a very light blue and draw a half circle. After letting the paint dry for a few minutes we are going to take the white paint once again to draw one tooth. Then we are going to take our black paint and very carefully outline Olaf’s eyes. Next we are going to outline olafs nose. After that we are going to draw inside of the white circles. Following that we are going to draw the eyes brows with our black paint. Inside of the nose we are going to draw two lines to make it look more carrot like. The final step is to outline the mouth with black. We are going to add one dimple on the left hand side, and then add a little line on the right side of the mouth and add the other dimple. Don’t forget to outline his tooth. And there’s Olaf!